We recommend letting the shop that does the painting also place the hood and adjust the other body panels if necessary. That is if the paint shop is
also a body shop.
If you must put it on yourself, or just want to see what the hood looks like, here are instructions on installation and adjustments.
First, remove your stock hood. :) Best done with two people.
Bolt up the vented hood using 8mm nuts with one side as washer with lock washer.
Do not fully tighten the hood, just hand tighten so that the hood can be moved.
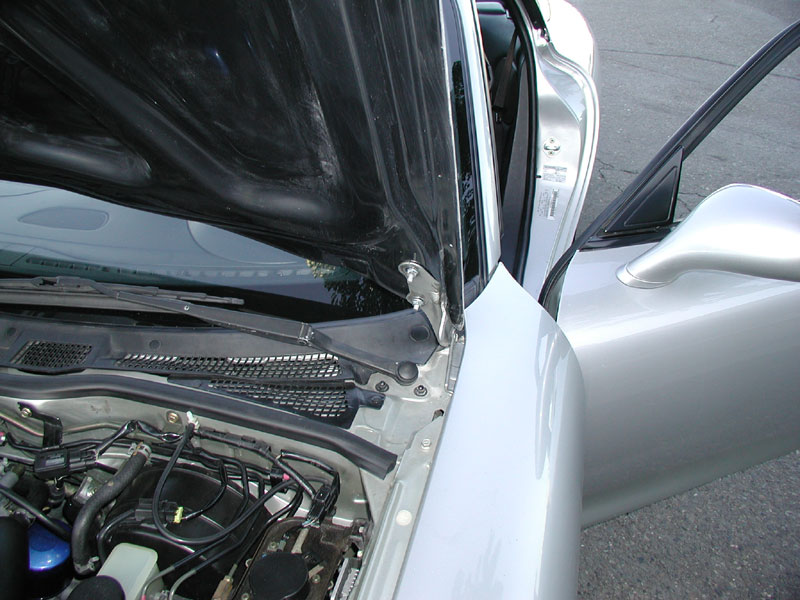
Next, close the hood and let the hood down onto slowly while watching the edges so that they do not rub on any of the body components.
If there is enough space on each side, try to close the latch and lightly close the hood with your open hand above the latch. Do not force the hood
as the hood latch may need to be raised.
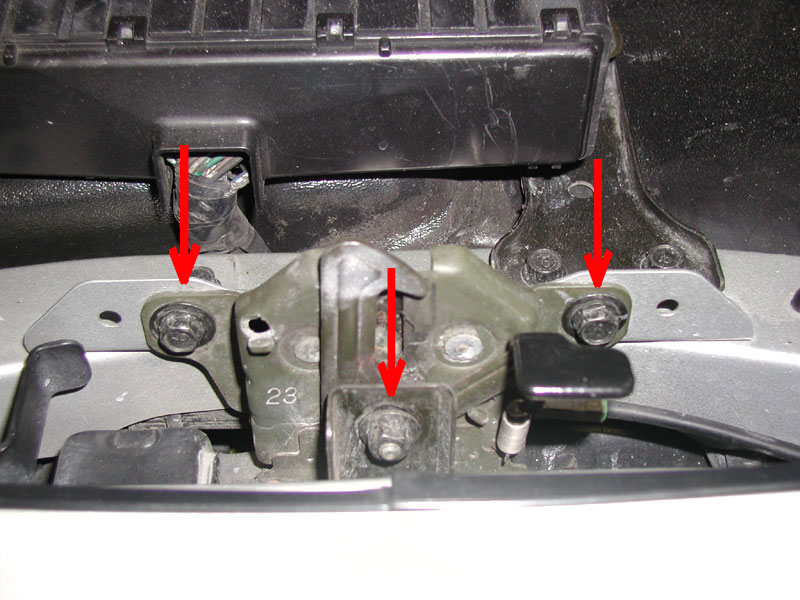
Whether the latch is too high or too low, it can be adjusted accordingly by loosening the three bolts seen above. They are 10mm.
Once the height is correct, check to see the gaps between the fender on each side and the hood. If one side is correct and on the other
side the space is too large, you may need to move that fender slightly.
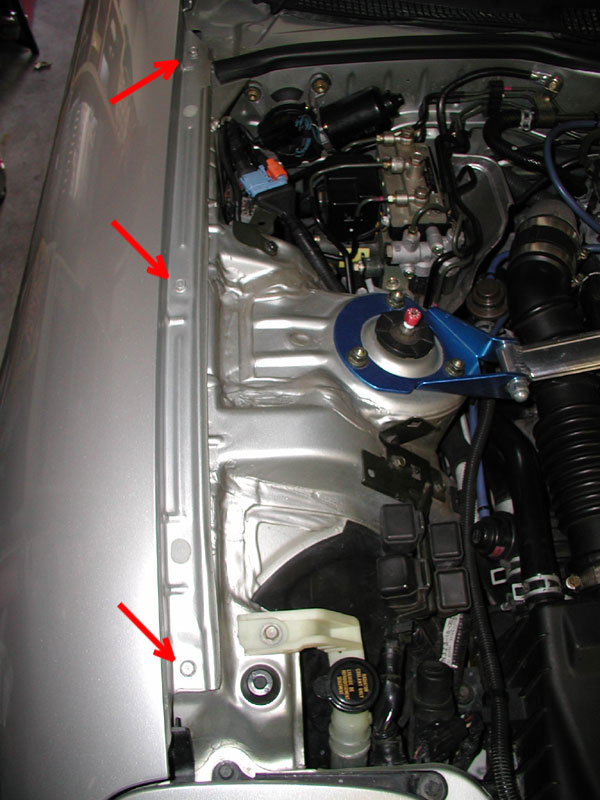
You can easily tell if the fender has ever been removed by looking for two small strips of a hard silicone or plastic that is placed under the front edge
of the hood and two thirds the way up on the engine bay side of the fender. If these are there and still attached to both the fender and the frame, then
the hood has never been removed.
Once you loosen the three bolts, 10mm, you may need to seperate that hard plastic / silicone from the fender. The fender should have approximately 1/16
of an inch play. It may not seem like much, but it makes a big deal in spacing.
Next is the front bumper. If it is too close to the hood and the hood is all the way back on the bolts in the back, then you have two choices.
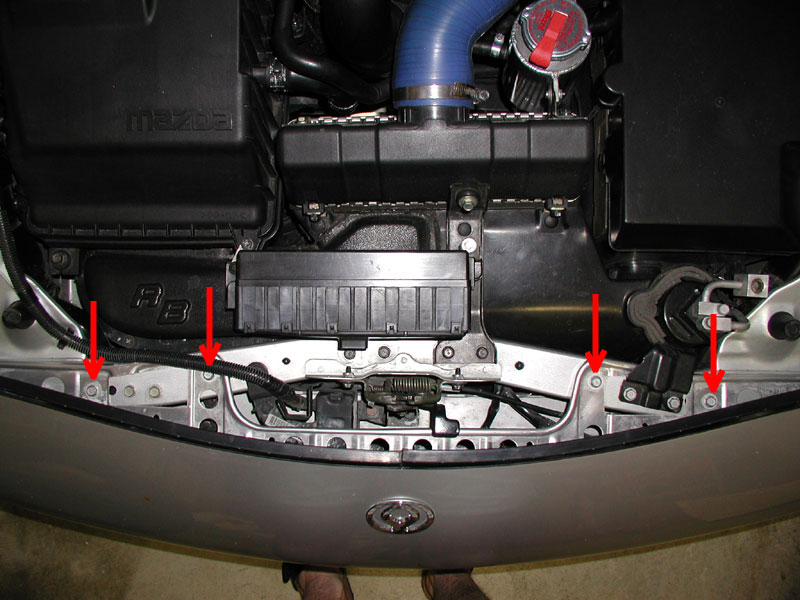
The easiest is to loosen the four 10mm bolts that hold the front bumper cover in place and slightly pull the bumper cover forward.
The second, and probably last resort, is to dremel the holes a 1/16 of an inch larger toward the back of the holes, firewall side.
Next the light covers may need to be adjusted up or down, or side to side. There are four phillips screws that need to be loosened. The two in the back
are readily accesible.

To get to the front screws, the black plastic cover on the light needs to be removed.
Remember that it is better to have the hood just come down and close without much force and move a few of the body parts, rather
than to force the hood into the location you want.